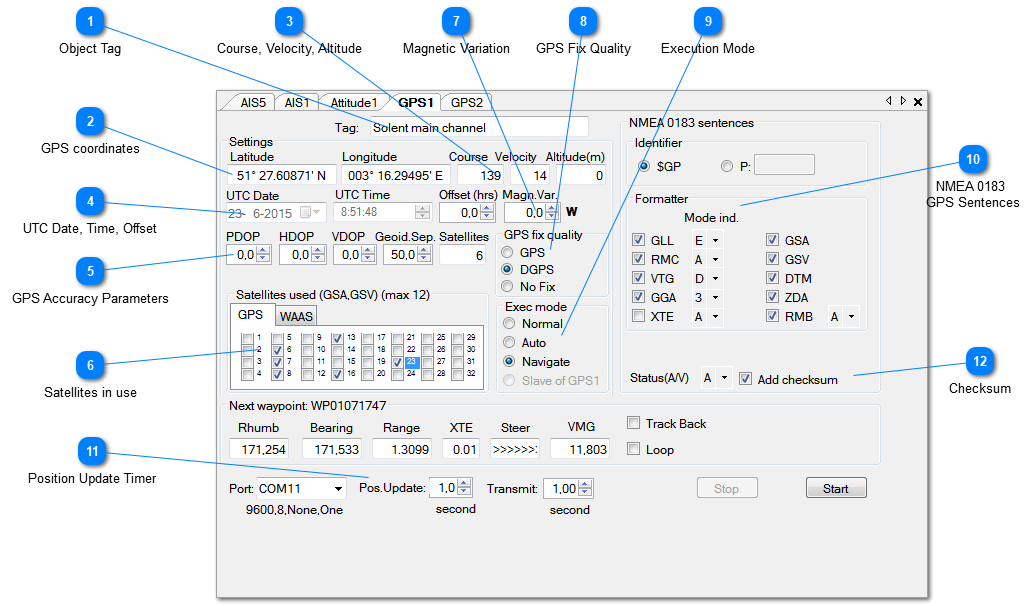
GPS instrument
Operation
To start there must be a valid starting position represented by the latitude/longitude fields. When a new GPS is instantiated the Latitude and Longitude values are initiated within the range you have set in the General Settings. First time users may find the way of inputting data in these fields a bit awkward in the beginning, but once used to it you will appreciate the "error proof" entry!
Valid values should also be present in all Control Center fields.
After clicking the "Start" button the GPS simulation will start, and NMEA sentences will be sent to the selected output port of the PC, until the "Stop" button is pressed. Note that only those NMEA sentences will be sent that have been checked in the "NMEA sentences" panel. When the Transmit Interval is set to 0.0 the sentences are output as "single shot" each time you click the "Start" button.
All sentences are shown in the I/O Port Monitor as they are output. When logging is ON (toolbar option), the sentences will also be written to the user selected log file.
Clicking the "Stop" button will suspend the operation, until "Start" is clicked again. Clicking the little X top-right will exit the object and save optionally all current values, so that next time the instrument is used it can continue where it stopped. Note: saving is an optional setting in the General Settings.
A short description of each field follows below.


 GPS coordinates
At creating a new GPS object, the Lat and Lon values are initially taken from the Program Settings. After starting the object, the coordinates are then dynamically updated every n second by calculating a new position from parameters like Velocity and Course, and embedded in the appropriate NMEA sentences before transmitting.
n is taken from the Position Update control (see below).
To change the value of either Latitude or Longitude the instrument must not be running.
To change: place the mouse cursor left of the leftmost digit. Then just start typing the new latitude or longitude, the cursor will advance automatically and the value will be automatically formatted. Example: 53° 21.56' N must be entered as 0532156000N.
After clearing, the fields will look like this: " ___° __._____' _".
|
 Course, Velocity, Altitude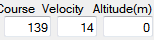
The values for these fields are taken form the Object Control Center and can be dynamically adjusted when this object is at the foreground and visible.
Note that the Course can also be influenced with the Rudder Control.
|
 UTC Date, Time, Offset
UTC Date and Time as this appears in the appropriate NMEA data.
The user can either choose for the "real" and actual UTC, or can choose to take a faked UTC.
In the latter case the UTC can be manually manipulated.
The method to be used is determined by a setting in the General Settings, NMEA tab.
|



 Magnetic Variation
Here you enter the Magnetic Variation for the RMC sentence. Select Easterly or Westerly variation by clicking E resp. W.
Initially the value is taken from the General Settings. Mind that this setting is also used in the Heading instrument.
|





 NMEA 0183GPS Sentences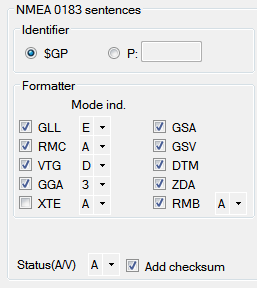
Here you select the sentences you want NemaStudio to output for this instrument and the Identifier, normally $GP but can also be changed to a proprietary ID.
For most sentences you can also select the desired mode indicator. For GLL, RMC, VTG, XTE and RMB the meaning of the Mode Indicator is, according to the NMEA 0183 specifications, as follows:
A = Autonomous mode
D = Differential mode
E = Estimated (DR) mode
M = Manual Input mode
S = Simulator mode
N = Data not valid
P = Precision (RMC sentence)
For the GGA sentence in NMEA 0183 version 2.30 and 3.01 (General Settings, NMEA settings tab) the GPS Fix Quality can be set as follows:
0 = invalid
1 = GPS fix (SPS)
2 = DGPS fix
3 = PPS fix
4 = Real Time Kinematic
5 = Float RTK
6 = estimated (dead reckoning) (2.3 feature)
7 = Manual input mode
8 = Simulation mode
Checking the "Add checksum" does exactly what it suggests.
The Status parameter can be set to Valid (A) or Invalid (V).
|